Expert Tips on How to Seal Seams on Waterproof Fabric
Waterproof fabrics are essential for outdoor gear, but their biggest weakness? Seams. Even the toughest waterproof materials can let water through the stitches if the seams aren’t properly sealed. Whether you’re preparing for a camping trip, fixing outdoor gear, or working on a DIY project, learning how to seal seams on waterproof fabric can make a huge difference.
This guide will walk you through the process step by step, helping you protect your gear from the elements.
What are Waterproof Fabrics?
Before we dive into seam sealing, let’s talk about the fabrics themselves. Waterproof fabrics are designed to keep water out, and they’re used in everything from rain jackets to boat covers. The most common types include:
Gore-Tex: The gold standard for waterproof, breathable fabrics. You’ll find it in high-performance outdoor clothing and gear.
Nylon: Often coated with waterproofing materials like polyurethane, this fabric is popular for tents and backpacks.
Polyester with PU Coating: Strong and durable, this fabric is used for things like tarps and covers for boats or outdoor furniture.
Silnylon: A super light, waterproof fabric that’s often used for ultralight camping gear like tarps and shelters.
These fabrics do a great job of keeping water out, but the seams are weak points that need extra attention. Without sealing them, water can sneak through, soaking your gear and ruining your day.
How Does Waterproof Seam Tape Work?
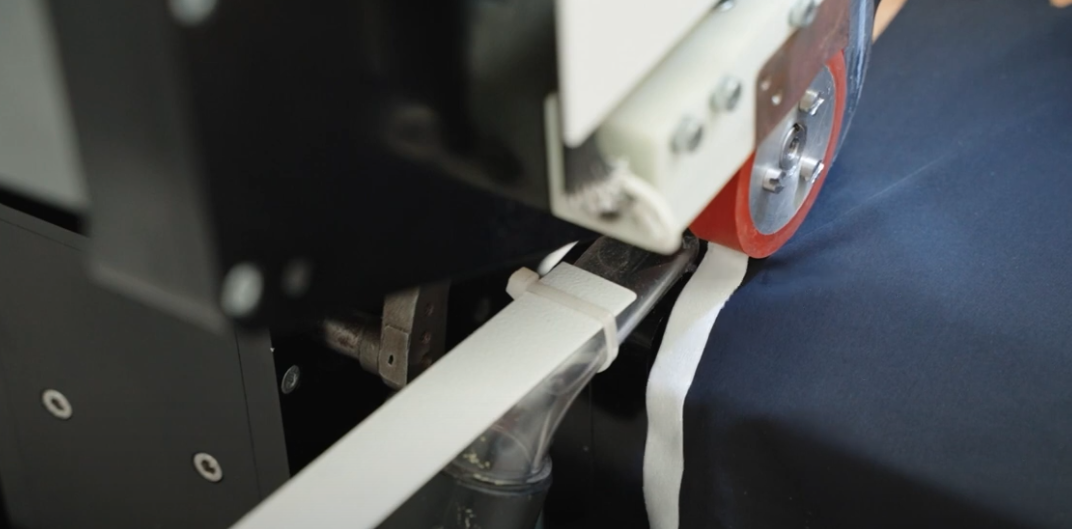
Wondering how does waterproof seam tape work? It’s all about heat and pressure. Waterproof seam tape is made from a material like polyurethane and has a heat-activated adhesive. When you apply heat, the adhesive melts and bonds to the fabric, creating a barrier over the seam that water can’t get through.
This method is especially effective on fabrics like Gore-Tex, where the tape helps keep the fabric’s waterproof and breathable qualities intact. It’s ideal for high-wear areas like elbows, knees, or tent corners, where seams are most vulnerable to leaks.
How to Seal a Seam in Fabric?
Sealing seams isn’t difficult, but it does require some patience. Here’s a simple guide on how to seal seams on waterproof fabric:
- Step 1: Clean the Seam Area
- Start by cleaning the area around the seam. Dirt and oils can stop the sealant from sticking properly. Use a soft cloth and a mild cleaner, then let it dry completely.
- Step 2: Choose Your Sealing Method
- There are two main methods for sealing seams:
- Fabric seam sealant: This is a liquid or gel that you can brush directly onto the seam. It fills in the tiny holes left by stitches, creating a flexible, waterproof barrier.
- Seam sealing tape: This tape, which is often used in professional gear, is heat-activated. Once applied with heat, it sticks to the fabric and seals the seam completely.
- Step 3: Apply the Sealer or Tape
- For sealant: Use a small brush or applicator to evenly coat the seam. Make sure to cover every stitch, especially at corners or stress points.
- For tape: Cut the tape to fit the seam. Use a hair dryer or a seam-sealing iron to activate the adhesive, then press the tape down firmly over the seam.
- Step 4: Let It Dry
- Once you’ve applied the sealant or tape, give it time to dry or cure. Follow the product instructions, this can take anywhere from a few hours to a full day. Once it’s fully dried, your seam should be watertight.
What is the Best Seam for Waterproofing?
To get the most out of your waterproof fabric, you need a strong seam. So, what is the best seam for waterproofing? It depends on your project, but here are the most common types:
Flat-felled seams: These are strong and durable, making them perfect for outdoor gear like tents and jackets. The fabric edges are folded and stitched flat, creating a low-profile seam that stands up to wear and tear.
French seams: These seams enclose raw fabric edges, offering a clean and neat finish. They’re not as strong as flat-fell seams but work well for lighter materials.
Taped seams: In high-end gear, especially those made from Gore-Tex, seam sealing tape is applied over the stitches. This creates a fully waterproof seam and is often the most reliable method.
Other Applications for Seam Sealing
Sealing seams isn’t just for jackets and tents. There are plenty of other uses for seam sealing in your everyday life:
Tents:
Sealing tent seams is a must if you want to stay dry during a rainstorm. Even if your tent is made from waterproof fabric, the seams can leak without proper sealing. Many tents come with pre-taped seams, but if yours doesn’t, it’s easy to do yourself with fabric seam sealant or seam sealing tape.
Backpacks:
Waterproof backpacks are great for hiking and travel, but the seams can be weak spots. Applying seam sealant or tape will help keep your gear dry, even if you get caught in a downpour.
Tarps and Boat Covers:
Tarps and boat covers are exposed to the elements 24/7, making seam sealing a crucial step in their maintenance. Whether you’re protecting your boat or covering outdoor furniture, using a fabric seam sealant or seam sealing tape will extend the life of your cover and keep everything underneath dry.
Common Mistakes to Avoid
When it comes to seam sealing, a few common mistakes can ruin your efforts. Here’s what to watch out for:
- Skipping the cleaning step: Dirt and oils on the fabric will stop the sealant or tape from sticking. Always clean the fabric first.
- Using too much sealant: Less is more when it comes to seam sealant. Apply a thin, even coat for the best results.
- Not enough heat with tape: Seam tape needs enough heat to activate the adhesive, but not too much. Be sure to follow the instructions for the best results.
- Rushing the drying process: Patience is key! Let the sealant or tape cure fully before testing your gear in wet conditions.
Test Your Waterproof Seams
After sealing your seams, it’s essential to test the waterproofing before using your gear in wet conditions. The easiest way to do this is by filling a spray bottle with water and lightly misting the seams. If you notice any water beads forming or seeping through, the seam may need additional sealing. Another method is to gently press down on the seam with a dry cloth after misting it, if the cloth becomes damp, water penetrates the seam.
Maintenance and Reapplication
Waterproof seams can degrade over time, particularly with regular exposure to sunlight, abrasion, and moisture. It’s essential to inspect the seams on your waterproof gear periodically. If you notice any signs of wear, such as peeling seam tape or cracking seam sealer, it’s time to reapply.
For high-use items like rain jackets or tents, consider reapplying a fresh layer of waterproof fabric seam sealer every season to ensure continued performance.
Wrapping Up…
Knowing how to seal seams on waterproof fabric is an essential skill for anyone working with outdoor gear or clothing. Whether you’re protecting a rain jacket or sealing a tent for your next camping adventure, knowing how to seal a seam in fabric ensures your gear will stay waterproof and last longer.
Don’t wait for the rain to test your gear! Take a few moments to seal those seams now and enjoy peace of mind on your outdoor adventures. Ready to keep your gear dry? Contact us today to get your seam sealing tapes and start protecting your equipment!


